
Tools
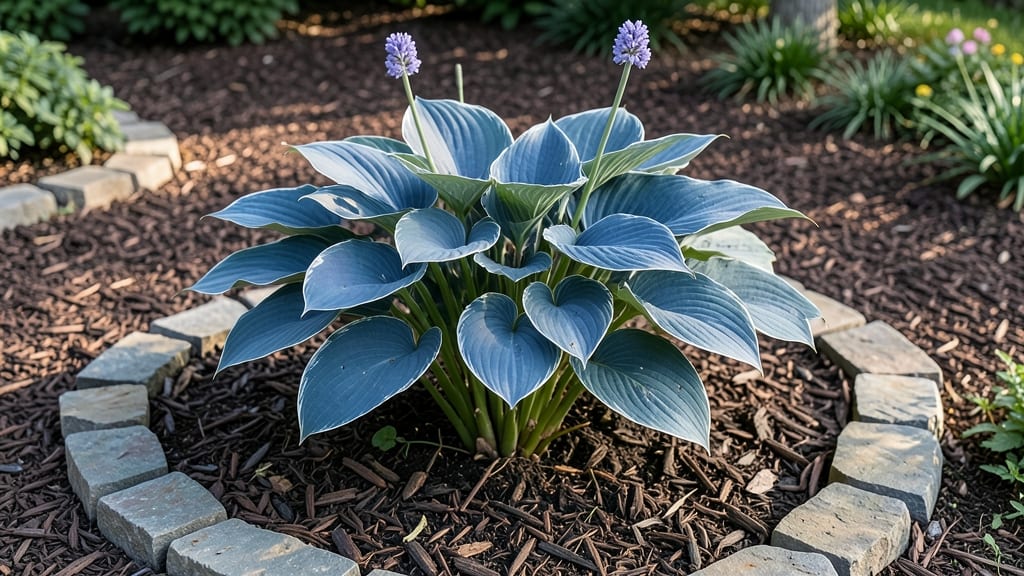
A pre-planned shade garden transforms forgotten corners into lush, private retreats—no more struggling with bare patches or deer-destroyed plants. 🌿 I’ve designed three foolproof layouts that thrive under trees, using deer-resistant foliage that stays vibrant all season long. The key?
Layering plants by height and texture so every inch feels intentional, not just filled. Start with tall, structural plants like hydrangeas or ferns as your backbone, then add mid-height shrubs such as inkberry holly or Japanese painted fern for depth.
Underneath, creeping ajuga or sweet woodruff weave together like a living carpet. Deer hate these plants, and they’re easy to maintain—just water them in the first year, and they’ll spread on their own.
By the end of summer, you’ll have a year-round green screen that blocks nosy neighbors and hungry critters. The foliage stays lush even when sunlight fades, and the layered look makes the space feel cozier than any fence ever could. Plus, no more fighting weeds—these plants outcompete them naturally.
Works for any backyard, from small city lots to sprawling estates. Here’s how to sketch your own design in under an hour!
📚 In This Guide
- What you need
- Instructions
- Tips and common mistakes
- Wrapping up and next steps
What you need
- ● Soil amendments: Compost (2–3 bags, 50 lbs each)
- ● Peat moss or coconut coir (1–2 bags, 1.5 cu. ft. each)
- ● Organic mulch (e.g., shredded bark, 10–15 cubic feet)
- ● Plants (deer-resistant varieties): 1–2 Hosta (tall varieties, e.g., 'Blue Angel')
- ● 3–5 Heuchera (e.g., 'Palace Purple')
- ● 2–3 Astilbe (e.g., 'Fanal')
- ● 1–2 Ferns (e.g., Dryopteris)
- ● 1 Boxwood shrub (3–4 ft. tall)
- ● 1 Inkberry Holly (Ilex glabra, 4–5 ft. tall)
- ● Tools: Garden trowel (for transplanting)
- ● Pruning shears (sharp, bypass-style)
- ● Garden gloves (durable, moisture-wicking)
- ● Wheelbarrow (for hauling soil/mulch)
- ● Measuring tape (50 ft. or longer)
- ● Watering can or hose with soaker nozzle
- ● Deer repellent spray (e.g., Liquid Fence)
- ● Edging material (metal or plastic, for clean borders)
- ● Garden stakes & twine (for support if needed)
- ● Slow-release fertilizer (e.g., Osmocote)
- ● Solar-powered garden lights (for ambiance)
Step-by-Step instructions for designing a layered shade garden
Here's how to create a lush, deer-resistant privacy screen that thrives in low-light conditions.
🌿 Step 1: Plan Your Plant Layers for Maximum Privacy
Start by sketching your garden space with three distinct layers: tall backdrops (6-10 feet), mid-height accents (3-5 feet), and ground covers (under 2 feet). I always begin with the tallest plants at the north or west edge to avoid shading lower layers prematurely. For deer resistance, focus on foliage plants like Japanese painted fern (Athyrium niponicum) for texture and boxwood (Buxus sempervirens) for structure.
Measure your space and mark planting zones—leave 3-4 feet between tall plants to allow airflow and prevent disease. I like to use evergreen shrubs like inkberry holly (Ilex glabra) for year-round coverage, as they maintain their leaves even in winter. Place them in clusters of three to create natural groupings that feel intentional rather than random.
🪴 Step 2: Prepare the Soil for Shade-Loving Plants
Shade gardens thrive in well-draining, organic-rich soil with a pH between 5.5 and 6.5. Before planting, amend the soil with 3-4 inches of compost and a slow-release fertilizer formulated for acid-loving plants. I use a leaf mold top dressing (available at garden centers) to improve moisture retention without compacting the soil—critical for shade plants that often struggle with poor drainage.
Test your soil’s moisture level by squeezing a handful—it should hold together but not feel soggy. If your soil drains too quickly, mix in 1 part peat moss to 3 parts native soil to retain moisture. Avoid heavy clay by adding coarse sand if the soil feels gummy when wet. This step ensures your plants won’t suffer from root rot, a common issue in shaded areas.
✂️ Step 3: Plant in Staggered Rows for Natural Screening
Begin with your tallest plants (like rhododendrons or mountain laurels) spaced 6-8 feet apart along the back edge. Dig holes twice as wide as the root ball but no deeper—this encourages roots to spread horizontally for stability. Gently remove plants from containers and loosen any circling roots with your fingers before placing them in the hole.
Fill the hole with soil, pressing lightly to eliminate air pockets, then water deeply to settle everything. For mid-height plants (such as heucheras or astilbes), create a staggered second row 2-3 feet in front of the tall plants. This layered approach ensures no gaps appear as plants mature. Mulch with 3 inches of shredded bark to suppress weeds and retain moisture—critical in shade where evaporation is slower.
☀️ Step 4: Maintain Light Conditions and Moisture
Shade gardens require consistent moisture—water deeply 2-3 times per week during dry spells, aiming for 1-1.5 inches of water per session. I use a soaker hose to deliver water at the base without disturbing foliage, which is especially important for delicate plants like Japanese forest grass (Hakonechloa macra). Avoid overhead watering, as wet leaves invite fungal diseases in humid shade environments.
Monitor light levels throughout the day—if lower leaves yellow or stems stretch toward any available light, your garden may need dappled sunlight. Thin out competing branches or add light-colored mulch to reflect ambient light downward. Deer-resistant plants like goat’s beard (Aruncus dioicus) and foamflower (Tiarella cordifolia) will thrive with minimal intervention once established.
🌱 Step 5: Prune and Refresh Annually for Long-Term Privacy
In early spring, prune back any dead or overcrowded branches to encourage bushier growth. I use clean, sharp shears to make cuts just above a leaf node or bud, ensuring a smooth recovery. For evergreens like boxwood, a light shaping in late winter keeps them dense and full. Remove any invasive weeds immediately—they’ll compete aggressively for nutrients in shade gardens.
Every 2-3 years, top-dress with 1-2 inches of compost to replenish organic matter. This step is non-negotiable for long-term health, as shade plants rely on steady nutrient availability. Watch for aphids or spider mites on new growth—spray with neem oil at the first sign of infestation. With consistent care, your layered shade garden will provide year-round privacy and texture while deterring deer naturally.
Tips & tricks for perfect layered shade gardens
Here's what I've learned from years of creating lush, deer-resistant privacy screens that actually work.
Plant Placement Strategy: In Step 1, when sketching your layers, pay special attention to the north or west edges—these areas receive less direct sunlight, making them ideal for your tallest plants. I've found that positioning evergreen shrubs like inkberry holly in clusters of three creates a natural, intentional look while providing better coverage than single plants. The 3-4 feet spacing between tall plants isn't just about aesthetics; it's crucial for airflow that prevents fungal diseases in shaded conditions.
Soil Preparation Insight: The soil amendments in Step 2 are where many shade gardens fail. Don't just add compost—focus on creating that perfect well-draining texture. I've seen too many gardens suffer from root rot because people skip the peat moss adjustment for sandy soils or ignore the clay issue. Test your soil's moisture by squeezing a handful—it should hold together like a damp sponge, not crumble like sand or stay clumped like mud. This simple check prevents years of frustration with struggling plants.
Root Handling Technique: When planting your tallest specimens in Step 3, take that extra moment to gently loosen circling roots before placing them in the hole. I learned this the hard way after watching several rhododendrons struggle because their roots were bound too tightly. The wider-than-deep planting holes encourage horizontal root growth, which is exactly what shade plants need to establish themselves firmly in low-light conditions. This one step makes all the difference in long-term stability.
Maintenance Secret: The watering schedule in Step 4 is non-negotiable for shade gardens. I've found that using a soaker hose not only delivers water efficiently but also prevents the fungal issues that come from overhead watering. That 1-1.5 inches per session measurement might seem precise, but it's what keeps your Japanese forest grass and other delicate plants thriving. And remember—those light-colored mulches aren't just decorative. They reflect ambient light downward, which is crucial when your plants are already struggling for sunlight.
Pro Tips for Pre Planned Shade Garden
- Here's what I've learned from years of creating lush, deer-resistant privacy screens that actually work.
- Plant Placement Strategy: In Step 1, when sketching your layers, pay special attention to the north or west edges—the...
- Soil Preparation Insight: The soil amendments in Step 2 are where many shade gardens fail. Don't just add compost—foc...
Frequently asked questions
Got questions about creating a pre-planned shade garden?
You’re not alone! Here are answers to the most common concerns to help you design a lush, low-maintenance retreat that keeps deer at bay.
What’s the best time of year to plant a shade garden?
For most regions, early spring or early fall are ideal. Spring gives plants time to establish roots before summer heat, while fall avoids drought stress. If you’re in a mild climate, late winter works too—just avoid frost-prone periods. Pro tip: Check your USDA hardiness zone for local timing!
How do I keep deer from munching my shade garden?
Deer-resistant plants like heuchera, ferns, hostas (with tough varieties), and astilbe are your best bet. Add physical barriers (like deer netting) or repellents (garlic-based sprays) for extra protection. Bonus: Plant deer-resistant ground covers like ajuga or lamium to fill gaps.
Can I mix sun-loving plants with shade plants in the same garden?
Not ideally—shade gardens thrive with low to no direct sunlight (4+ hours of shade). If you have partial shade (4–6 hours of sun), opt for tolerant plants like impatiens or coral bells. For full sun spots, create a separate border with sun-loving perennials like black-eyed Susans.
Is a pre-planned shade garden more expensive than DIY?
Upfront costs may be higher for pre-planned kits (due to curated plant selections and layout), but they save time and reduce waste. DIY can be cheaper if you source plants locally or propagate your own. Cost-cutting tip: Start small with container gardens or layer in perennials over time!
What if my shade garden looks sparse after the first year?
Shade plants often take 2–3 years to fill in. Troubleshoot:
- Check soil moisture—shade gardens stay damp longer; ensure good drainage.
- Add mulch (3–4 inches) to retain moisture and suppress weeds.
- Fertilize lightly in early spring with a slow-release, acid-loving plant fertilizer.
Wrapping up and next steps
A pre-planned shade garden isn’t just about filling empty space—it’s about crafting a serene, functional retreat that thrives with minimal effort. By layering deer-resistant foliage and strategic plant choices, you’ve set the stage for year-round privacy, beauty, and resilience.
Whether you’re a seasoned gardener or a curious beginner, this design makes shade gardening simple, sustainable, and satisfying.
Ready to transform your space? Start by sketching your garden layout—mark sun exposure, measure key areas, and jot down your favorite foliage picks. Then, gather your tools and dive in! Your future shady oasis is just a few steps away. 🌿✨