
Light Requirements
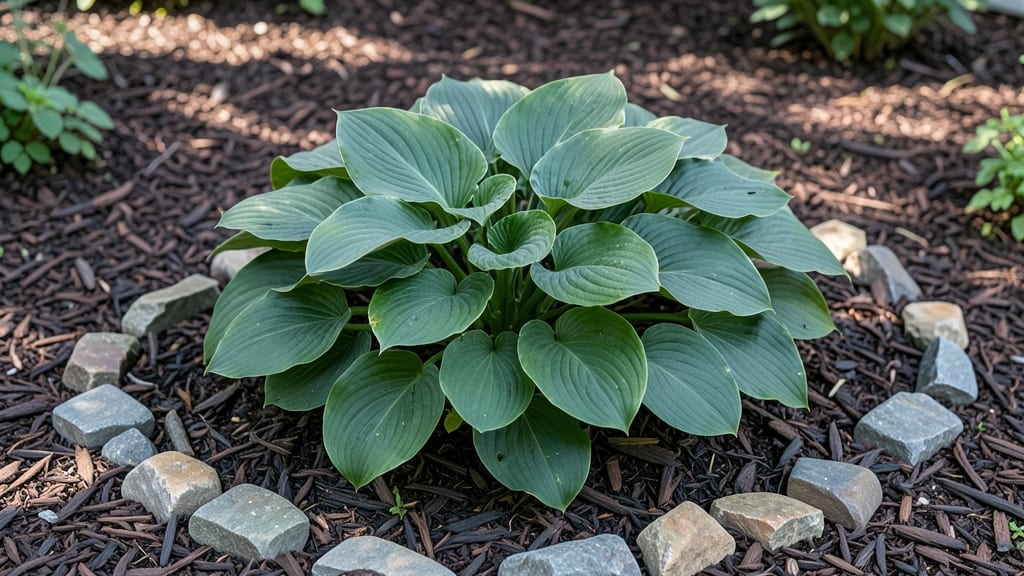
Hostas for partial shade transform shady spots into lush green havens. 🌿 I’ve filled my woodland garden with these plants, and they’ve never disappointed—even in the dimmest corners where other plants struggle.
The key is understanding exactly how much shade they can handle and what they need to thrive when sunlight is limited.
Partial shade means 3-6 hours of dappled sunlight—think filtered light through trees or morning sun with afternoon shade. Hostas love rich, well-draining soil with plenty of organic matter, and they’re surprisingly forgiving about watering once established.
The real secret? Spacing them 12-24 inches apart so their broad leaves can spread without competing for light.
By summer, you’ll have a vibrant, velvety carpet of foliage that stays lush even when other shade plants wilt. The best part? Hostas multiply over time, creating natural ground cover that chokes out weeds and keeps the soil cool. Just avoid soggy soil—their roots rot faster than you’d think.
Works for borders, woodland gardens, or even container plantings near north-facing walls. Once you see how they brighten up shady spots, you’ll wonder why you didn’t start sooner. Here’s how to set them up for success!
📚 In This Guide
- What you need
- Instructions
- Tips and common mistakes
- Wrapping up and next steps
What you need
- ● Hosta plants: Choose 3–5 varieties (e.g., Hosta 'Blue Angel', 'Francee', or 'Guacamole') based on your shade tolerance and foliage preferences. Pro tip: Buy from reputable nurseries for disease-resistant stock!
- ● Well-draining potting mix or garden soil: 5–10 gallons (depending on pot size or garden bed). Amend with compost (2–3 cups per plant) for nutrient-rich soil.
- ● Organic mulch: 2–3 inches of shredded bark, pine straw, or leaves to retain moisture and suppress weeds.
- ● Watering can or hose with a gentle spray nozzle: Hostas love consistent moisture—aim for 1–1.5 inches per week.
- ● Garden gloves: Protect your hands from soil and sharp mulch edges!
- ● Hand trowel or transplanting spade: For digging holes (6–8 inches deep and wide for each plant).
- ● Pruners or shears: To trim dead foliage or divide mature hostas in spring.
- ● pH testing kit: Ensure soil pH is between 6.5–7.5 (hostas prefer slightly acidic to neutral soil).
- ● Slow-release fertilizer (e.g., 10-10-10): Apply 1–2 times per year in early spring and midsummer.
- ● Garden stakes or labels: Mark varieties if planting multiple types for easy identification.
Step-by-Step guide to planting and caring for hostas in partial shade
Hostas love dappled light—here's how to give them the perfect home for lush, vibrant growth.
🌱 Step 1: Choose the Right Hostas and Planting Location
Hostas thrive in partial shade, meaning 3-6 hours of morning sun or filtered light all day. Avoid deep shade or full sun—both stress the plants. I always look for hostas labeled as "shade-tolerant" or "partial shade" when shopping. Popular varieties like 'Blue Angel' or 'Francee' handle dappled light beautifully.
Test your spot by observing sunlight patterns for a week. If leaves stay dry but receive bright, indirect light most of the day, it’s ideal. Dig a hole twice as wide as the root ball but only as deep as the container’s base. Hostas hate being planted too deep—the crown should sit just below soil level to prevent rot.
🪴 Step 2: Prepare Soil and Plant Hostas Correctly
Hostas prefer moist, well-draining soil with a slightly acidic to neutral pH (6.0-7.5). Amend heavy clay soil with 2-3 inches of compost or peat moss to improve drainage. I mix in a handful of slow-release fertilizer (like 10-10-10) at planting to give roots a nutrient boost without burning them.
Gently remove the hosta from its container and loosen the roots if they’re circling. Place it in the hole so the crown sits level with the soil surface—never buried. Backfill with native soil, pressing lightly to eliminate air pockets. Water deeply to settle the soil and encourage root contact. You’ll know it’s right when the soil surface looks slightly damp but not soggy.
💧 Step 3: Water Consistently and Mulch for Moisture Retention
Hostas need consistent moisture but hate soggy roots. Water 1-2 times per week, depending on rainfall, until the soil feels 2-3 inches deep. The best way to check is by sticking your finger in—if it’s dry, water; if damp, wait. Overwatering causes yellow leaves, while underwatering leads to crispy edges. I always water in the early morning to reduce evaporation.
Spread 2-3 inches of mulch (like shredded bark or pine needles) around the base, keeping it 2 inches away from the crown to prevent rot. Mulch locks in moisture and keeps roots cool in summer. Replenish it annually—thin mulch loses effectiveness fast. In winter, add an extra inch to insulate roots from freezing temperatures.
☀️ Step 4: Monitor Light and Fertilize for Vibrant Foliage
If hosta leaves start looking pale or stretched, they need more light—move them slightly closer to a light source. Conversely, dark green with yellow edges means too much sun. Hostas adjust slowly, so relocate gradually over a week. I rotate my containers quarter-turn weekly to ensure even growth and prevent leaning toward light.
Feed hostas twice a year: once in early spring with a balanced fertilizer (like 10-10-10) and again in mid-summer with a low-nitrogen, high-potassium formula (like 5-10-10) to boost root strength. Avoid high-nitrogen fertilizers—they promote leafy growth at the expense of flower production. Always water before and after fertilizing to prevent root burn.
✂️ Step 5: Divide and Prune for Long-Term Health
Hostas multiply quickly and benefit from division every 3-4 years when clumps become crowded. The best time is early spring or fall when the plant isn’t actively growing. Dig up the clump, rinse off the roots, and separate it into 3-5 inch sections with 3-5 leaves each. Replant immediately—hostas hate drying out during division.
Remove dead or yellow leaves in early spring to encourage new growth. Cut back brown, damaged foliage after the first frost in fall. I never trim healthy green leaves—they photosynthesize until frost. If slugs become an issue (they love hostas!), set out beer traps or apply iron phosphate bait—chemical slug killers can harm beneficial insects.
Tips & tricks for perfect hostas in partial shade
Here’s what I’ve learned after years of growing hostas—these tricks make all the difference for vibrant, healthy plants.
Location Scout Like a Pro: Before planting, observe your garden for a full week to map out sunlight patterns. The ideal spot gets 3-6 hours of morning sun but avoids harsh afternoon rays. I test spots by placing a white plate where I plan to plant—if it stays dry but gets bright, indirect light most of the day, it’s perfect. This prevents the common mistake of planting in spots that seem shady but actually get too much sun later in the day.
Soil Prep That Makes a Difference: The 2-3 inches of compost or peat moss mentioned in Step 2 isn’t just about drainage—it’s about creating a sponge-like environment that holds moisture without suffocating roots. I always mix in a handful of slow-release fertilizer (10-10-10) right at planting to give roots an instant energy boost. Pro tip: If your soil is sandy, add a bit of coconut coir to help retain moisture longer between waterings.
Watering Wisdom: Those 1-2 waterings per week can be tricky—especially in containers. I use a moisture meter to check 2-3 inches deep instead of guessing. Early morning watering isn’t just about reducing evaporation; it gives leaves time to dry completely before nightfall, preventing fungal issues. For container hostas, I water until it drains from the bottom—this ensures the roots get properly hydrated without sitting in water.
Mulch Like You Mean It: The 2-3 inches of mulch should be replenished every spring because it breaks down over time. I use cedar chips because they naturally repel pests while keeping roots cool. Keep that mulch 2 inches away from the crown—this small detail prevents rot that can kill your plant. In winter, I double the mulch thickness to protect against freezing temperatures, which is especially important in colder climates.
Pro Tips for Hostas For Partial Shade
- Here’s what I’ve learned after years of growing hostas—these tricks make all the difference for vibrant, healthy plants.
- Location Scout Like a Pro: Before planting, observe your garden for a full week to map out sunlight patterns. The ide...
- Soil Prep That Makes a Difference: The 2-3 inches of compost or peat moss mentioned in Step 2 isn’t just about draina...
Frequently asked questions
Got questions about growing hostas in partial shade?
You’re not alone! Here are answers to the most common concerns—from sunlight struggles to pest problems—so you can keep your hostas happy and healthy.
What exactly is "partial shade," and how much light do hostas really need?
Partial shade means 3–6 hours of dappled or indirect sunlight daily. Hostas tolerate morning sun but can scorch in harsh afternoon rays. Too little light (under 3 hours) leads to leggy growth, while too much (direct sun) causes leaf burn. Test your spot with a light meter or observe how shadows move—aim for filtered light under trees or near buildings.
When is the best time to plant hostas in partial shade?
Plant hostas in early spring or early fall for ideal results. Spring planting (March–May) lets roots establish before summer heat, while fall (September–October) avoids winter stress. Avoid planting in peak summer—roots struggle in extreme heat. Pro tip: Water deeply after planting and mulch to retain moisture!
What are the most common pests for hostas, and how do I prevent them?
Hostas attract slugs, snails, and deer (especially in partial shade). To deter pests:
- Slugs/Snails: Use beer traps, diatomaceous earth, or copper barriers around plant bases.
- Deer: Install fencing (at least 8 feet tall) or plant deer-resistant companions like ferns or astilbes nearby.
- Prevention: Keep garden beds tidy—pests hide in debris!
Can I grow hostas in containers with partial shade?
Containers work well for hostas in partial shade, but choose large pots (12+ inches deep) with drainage holes. Use well-draining soil mixed with compost, and water frequently—containers dry out faster. Pro tip: Move pots to brighter spots in winter if growth slows!
Why are my hosta leaves turning yellow or brown in partial shade?
Yellowing (chlorosis) often signals nutrient deficiencies (like iron) or overwatering. Brown edges? It could be dry air, salt buildup, or too much sun. Check your soil pH (hostas prefer 6.0–7.5) and adjust with compost or sulfur. Troubleshoot: Trim damaged leaves and adjust watering—hostas hate soggy roots!
Wrapping up and next steps
Hostas for partial shade are a game-changer for gardeners craving lush, low-maintenance plants that flourish in dappled light. Their diverse colors, textures, and sizes make them perfect for adding year-round interest to shady spots—whether in borders, containers, or woodland gardens.
With the right soil, watering, and a little care, these resilient perennials will reward you with vibrant foliage for seasons to come.
Ready to transform your shady garden? Pick 2–3 hostas that catch your eye, prep your soil, and plant them with confidence—your future garden will thank you! 🌿✨